
DepositView® User Administration Guide
User Administration
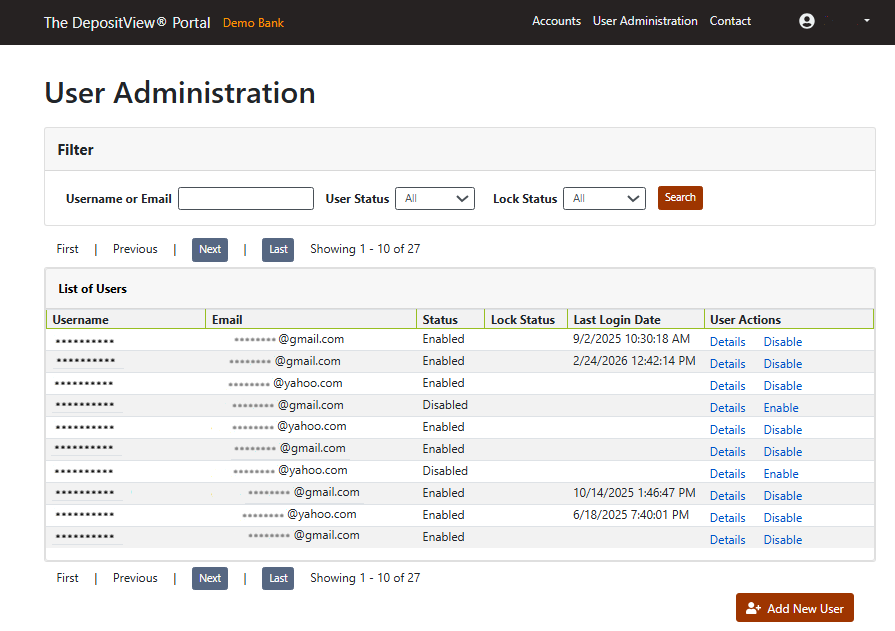
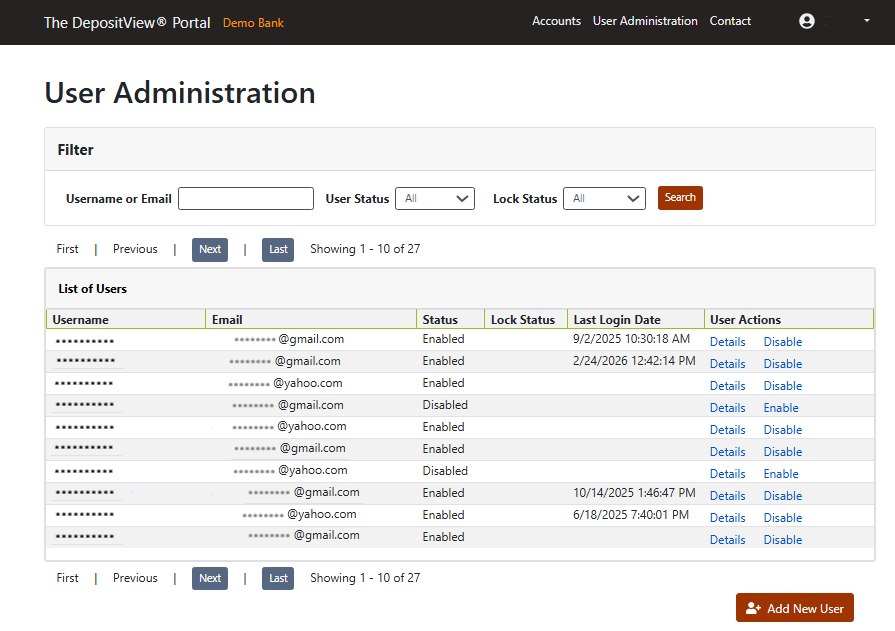
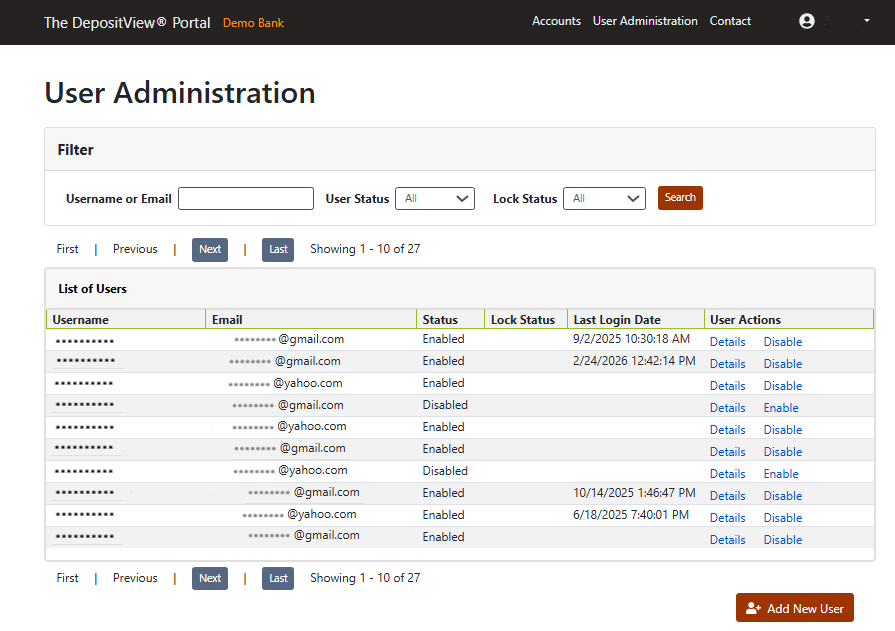
The User Administration page lists all relevant users that have access to DepositView®.
Access User Administration
Note: This access applies only to profile management for end-customers – it does not apply to other user accounts at the client-level. If additional client-level access is needed, please contact R&T Client Services or your R&T Relationship Manager.
To access the User Administration page, click on User Administration from the top navigation.
Search for Users
You can search via the Username or Email field and filter by User Status and Lock Status. Please refer to the User Details section below to learn how to interact with the search result.

Create User
Accounts and Contact Details
To add a new user to an account:
-
Click on Add New User.

-
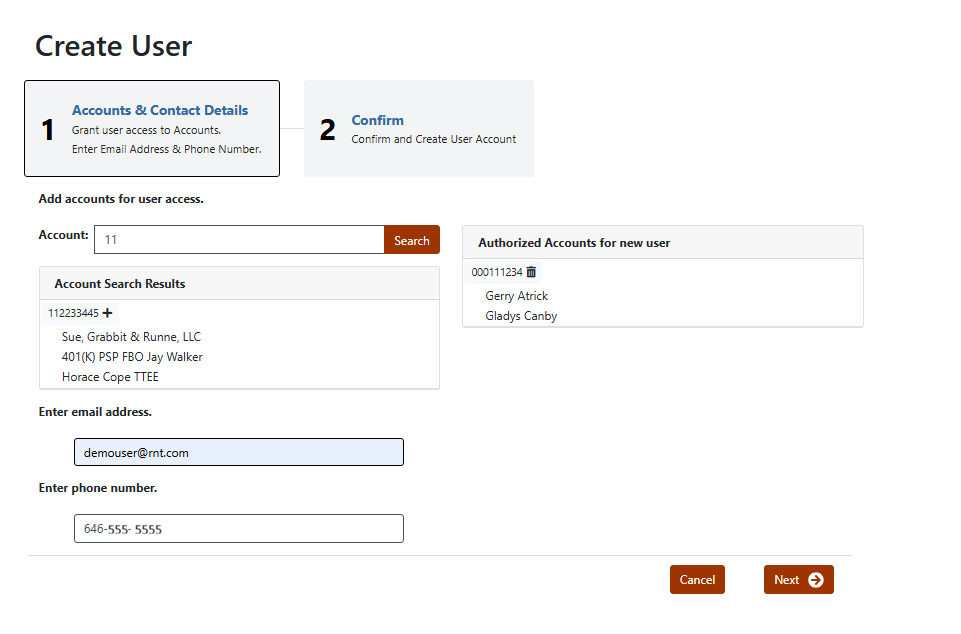
Enter the appropriate Account Number in the Search field or type a partial number and select the Account from the dropdown list.
The Account appears in Authorized Account for new user.
To remove the Account click on the trash icon.
-
Enter the new user’s email address and phone number.
-
Click Next to confirm user details.
-
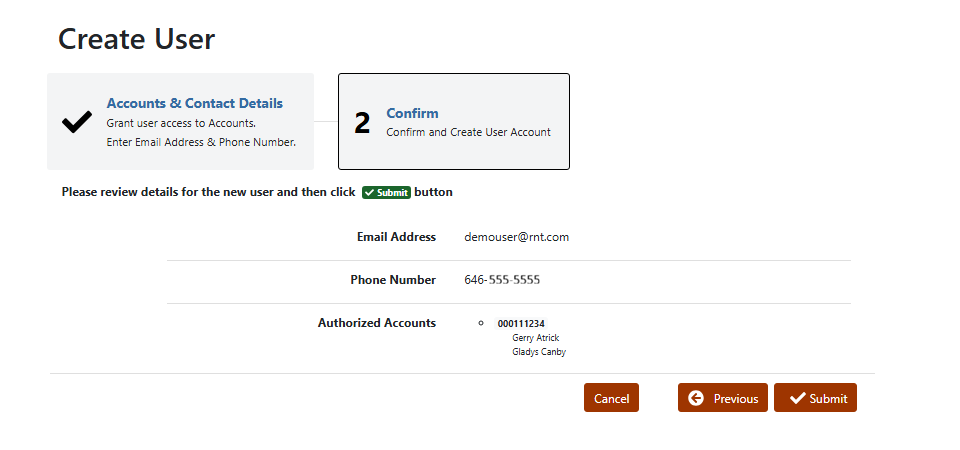
Verify the accuracy of the user's details, then click Submit to create the new user. A "User Created Successfully" confirmation should appear.

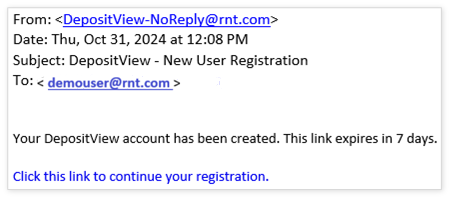
The new user receives an email notification asking them to register their new account.
User Details
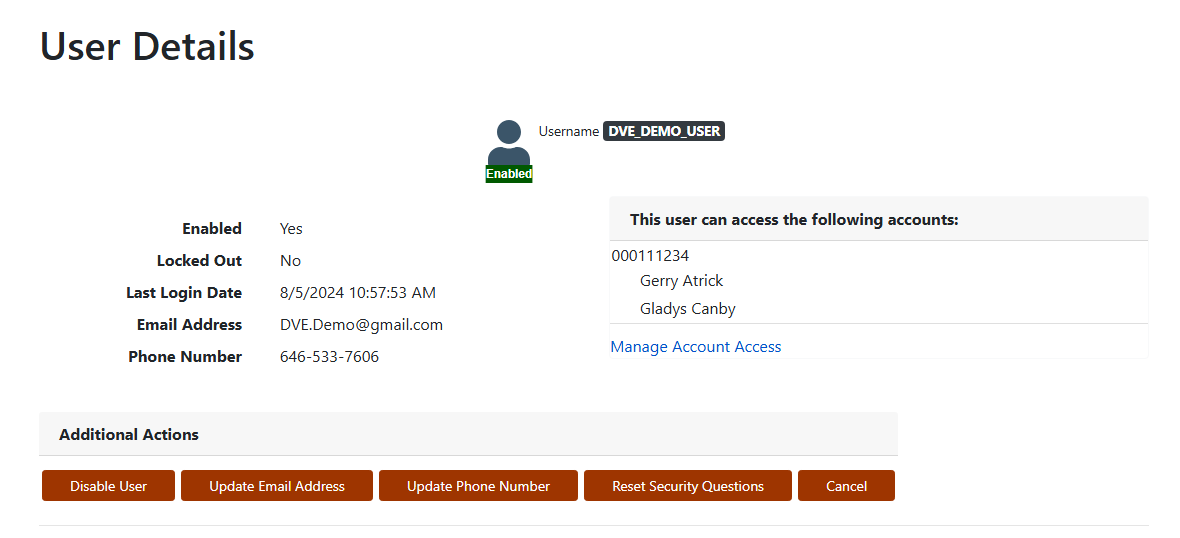
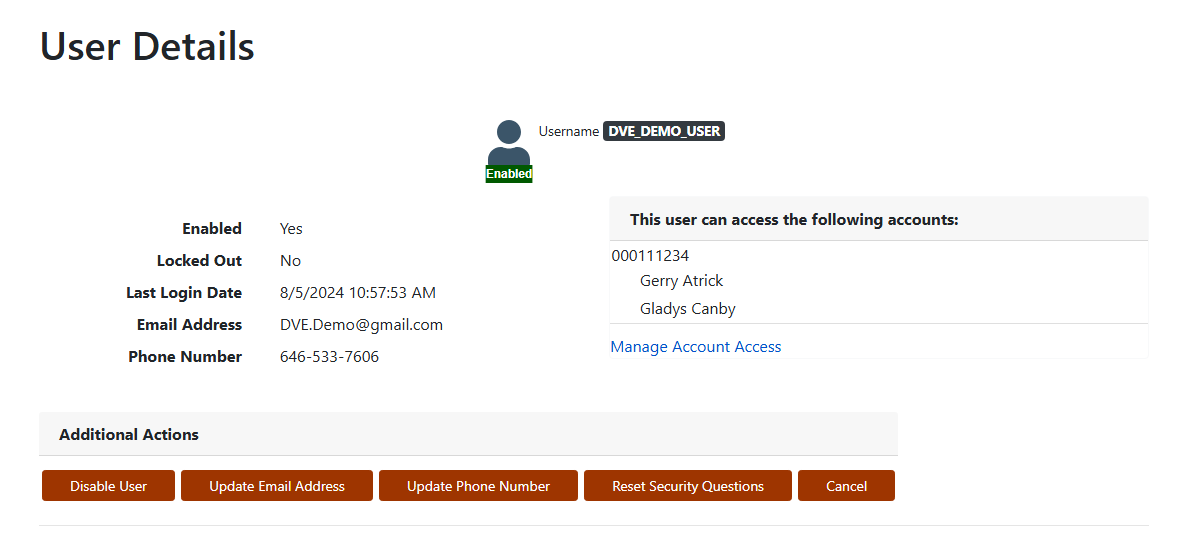
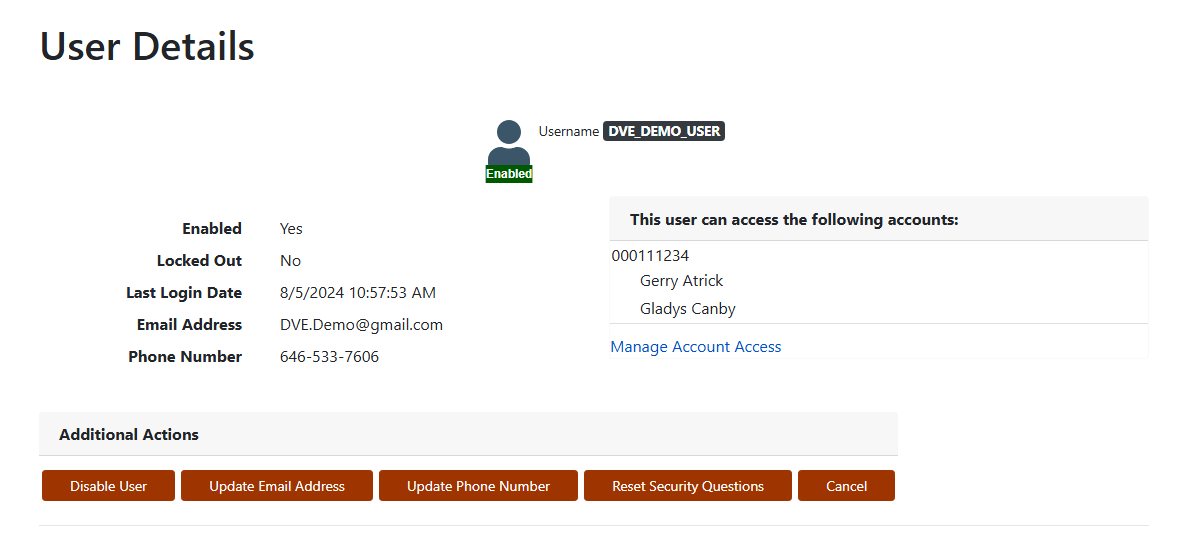
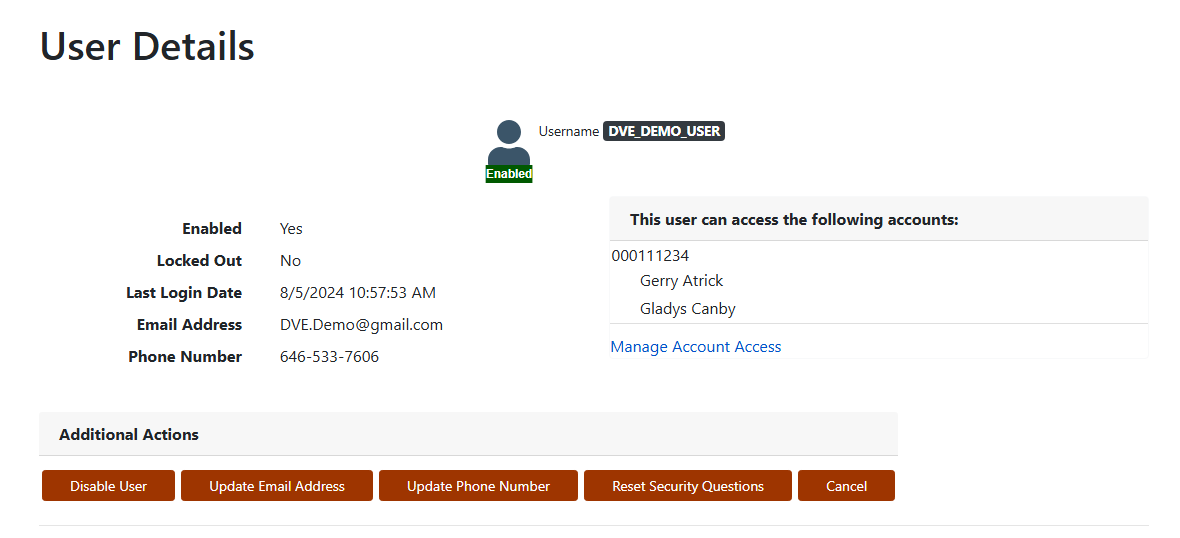
The User Details page provides you with an overview of a specific user and their associated account(s). From this page, you can:
- add or remove accounts for a user,
- disable a user,
- update email address,
- update phone number, and
- reset security questions.
Account Management
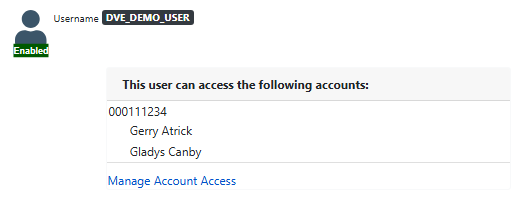
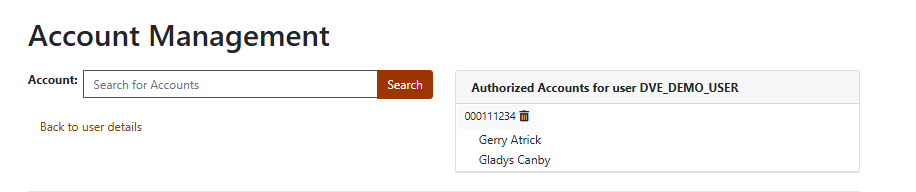
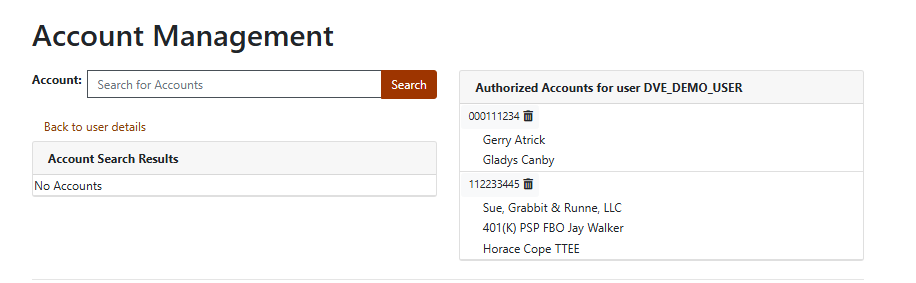
Account Management enables you to add or remove accounts for a specified user. To access Account Management:
- Click on Manage Account Access.
Add an Account
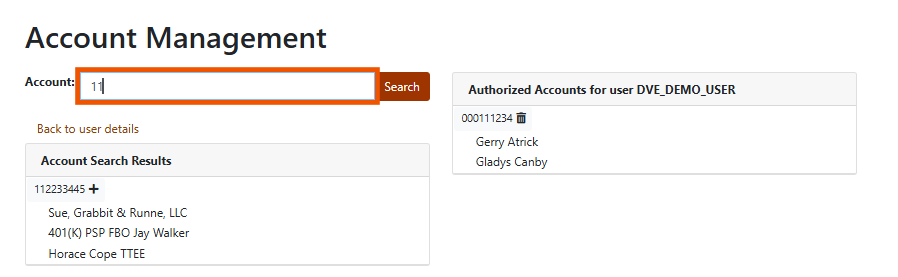
To add an account, use the search field to look for an account number. When the account number appears after searching, click the plus icon adds the account to a specified user.
Remove an Account
To remove an account, click the trash icon next to the account number in the Authorized Accounts for user section.
Additional Actions

Disable User
Disable User allows you to revoke user access.
-
Click on Disable User on the User Details page.
-
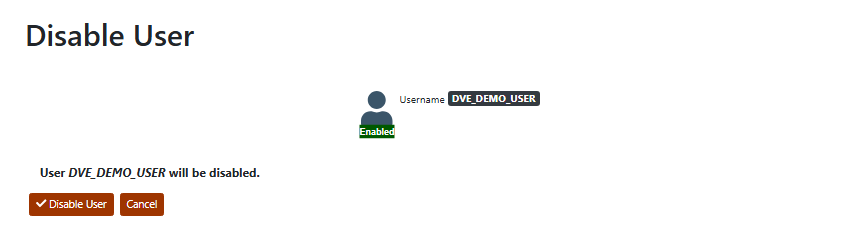
Click on Disable User to confirm.
Alternatively, you can disable an enabled user from the User Administration page by searching for the enabled user and clicking on the Disable link in the User Actions column.
Enable User
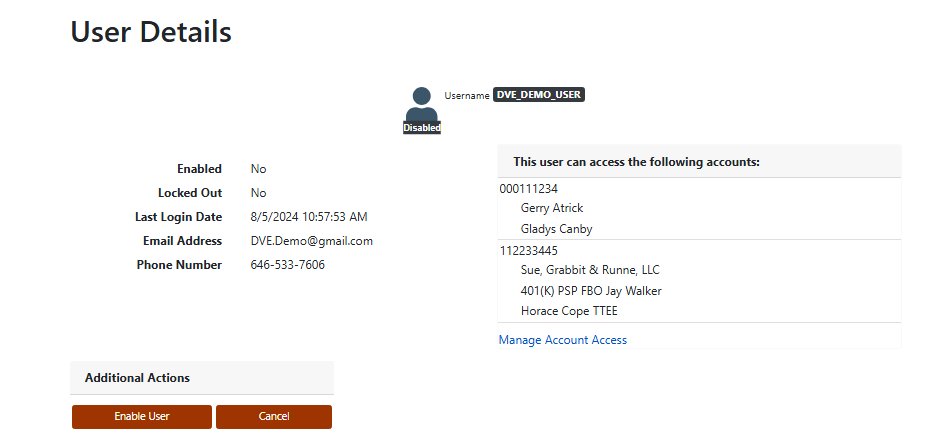
If a user was disabled, you can re-enable them.
-
Click Enable User on the User Details page.
-
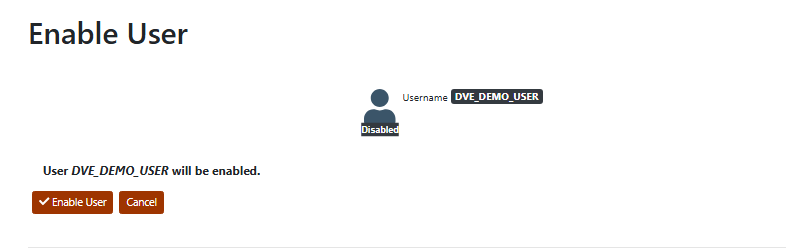
Click Enable User to confirm.
Alternatively, you can enable a disabled user from the User Administration page by searching for the disabled user and clicking on the Enable link in the User Actions column.
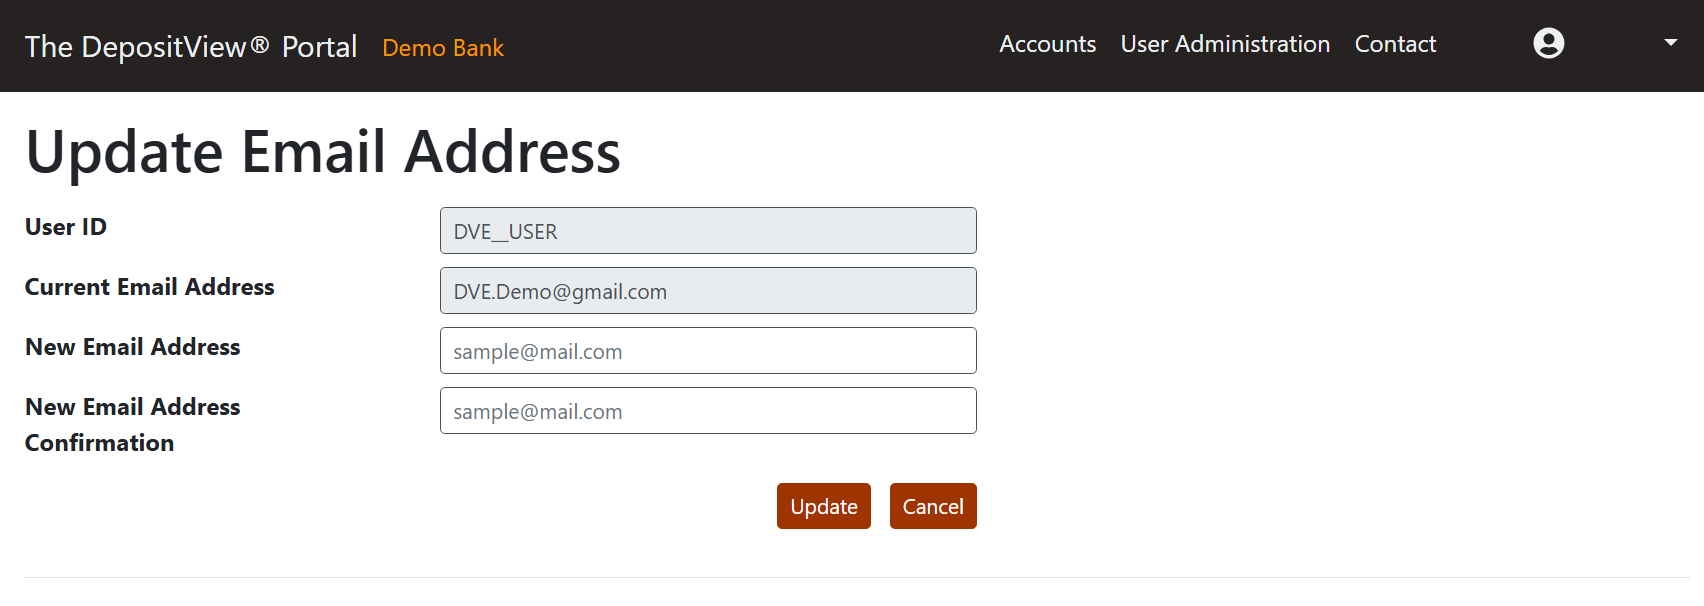
Update Email Address
-
Click Update Email Address to modify the information on file.
-
Verify the User ID and Current Email Address.
-
Enter your New Email Address.
-
Enter your New Email Address a second time to confirm.
-
Click Update.
Update Phone Number
-
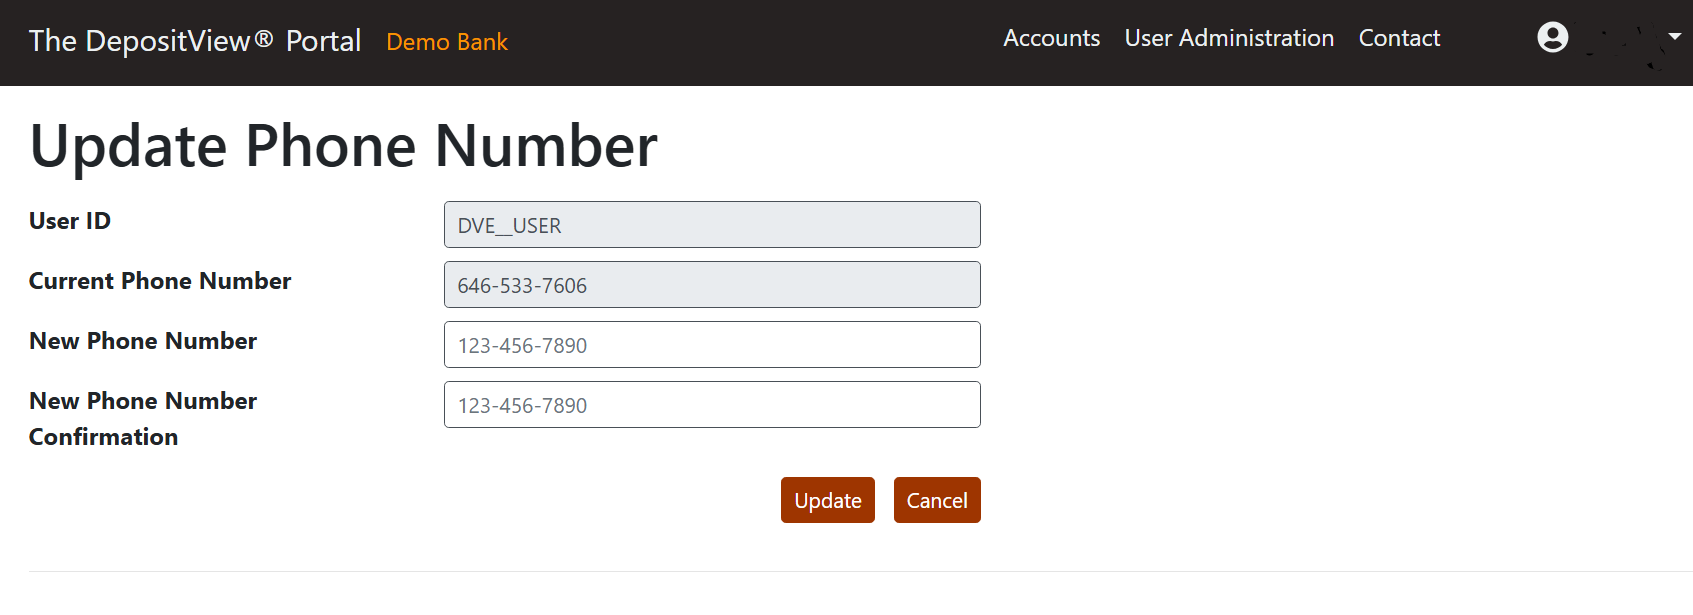
Click Update Phone Number to modify the information on file.
-
Verify your User ID and Current Phone Number.
-
Enter your New Phone Number.
-
Enter your New Phone Number a second time to confirm.
-
Click Update.
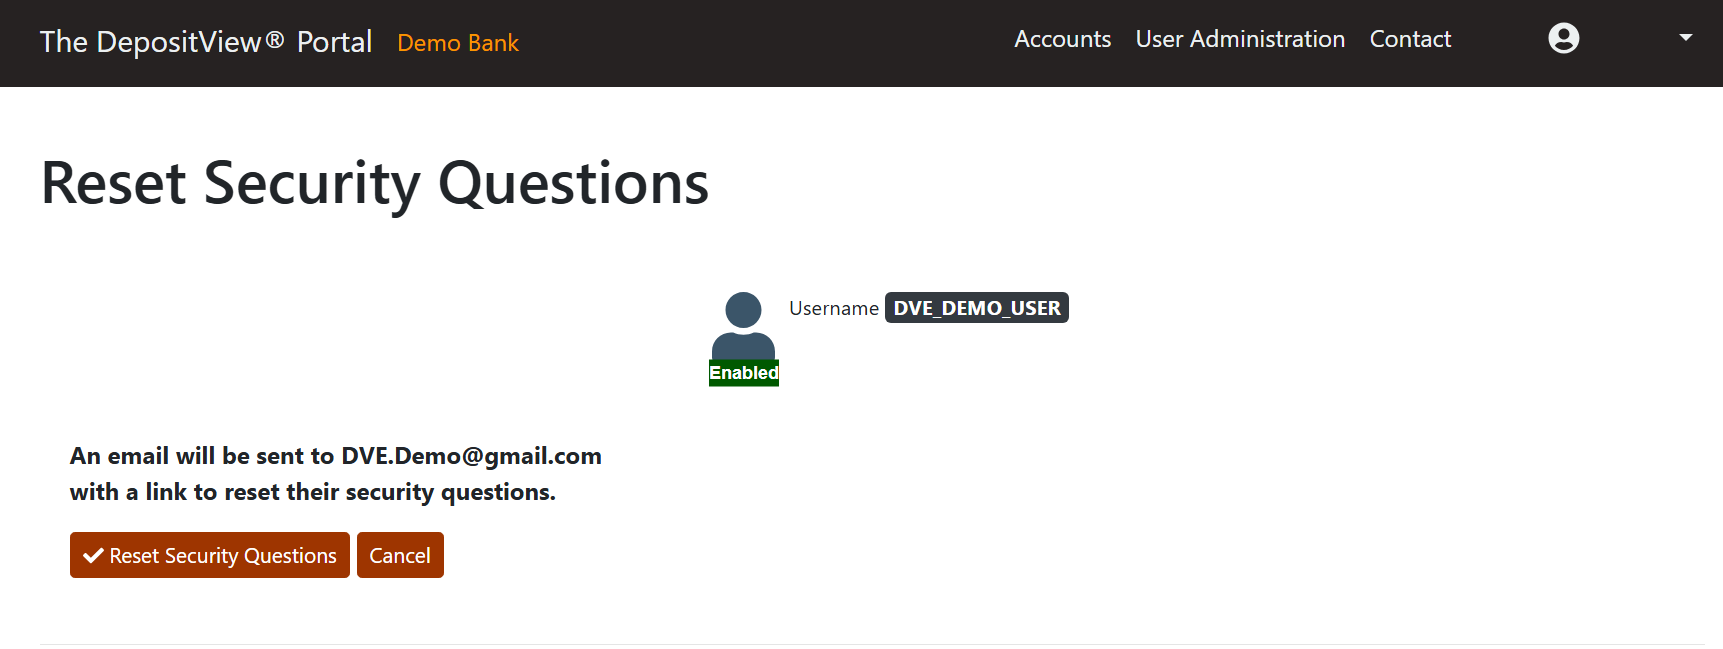
Reset Security Questions
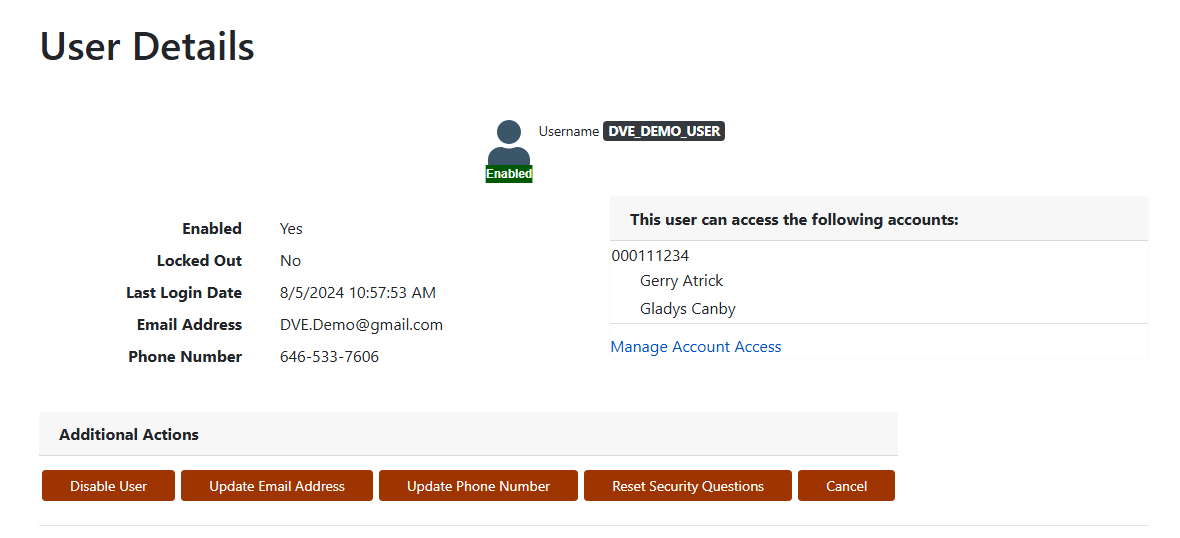
The Reset Security Questions page allows you to enable users to update their security questions and answers.
-
Click Reset Security Questions.
-
Click Reset Security Questions to send users a reset link via email.
Updated 20 days ago