
DepositView® Customer User Guide
DepositView is an online portal for clients enrolled in the Demand Deposit Marketplace® (DDM) and Certificate of Deposit Marketplace Exchange® (CDMX) programs. Use this portal to manage the following features based on your program:
-
DDM Users: Access your balances, transaction history, and DDM Express Statements. You can also view your fund allocations across FDIC-insured banks within the program.
-
CDMX Users: Access features tailored to the CDMX Program, including viewing active and matured CDs, allocation tracking and CDMX Express Statements.
Getting Started
You can access DepositView through Single Sign-On (SSO) or Multi-Factor Authentication (MFA), depending on your organization's setup.
Single Sign-On (SSO)
-
Connect: Click the URL link provided to you by your institution.
-
Authenticate: Enter your credentials, if prompted. Your login requirements depend on your organization's preset controls.
-
Access: Upon successful login, you are directed to the Accounts page.
Multi-Factor Authentication (MFA)
New User Registration (MFA Only)
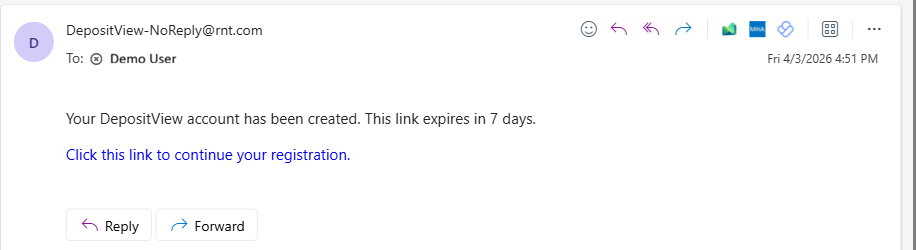
If you are a new user, an administrator will create your account. You will receive a registration email from [email protected] containing a link that expires in 7 days.
-
Start Registration: Click the link in your "New User Registration" email.
-
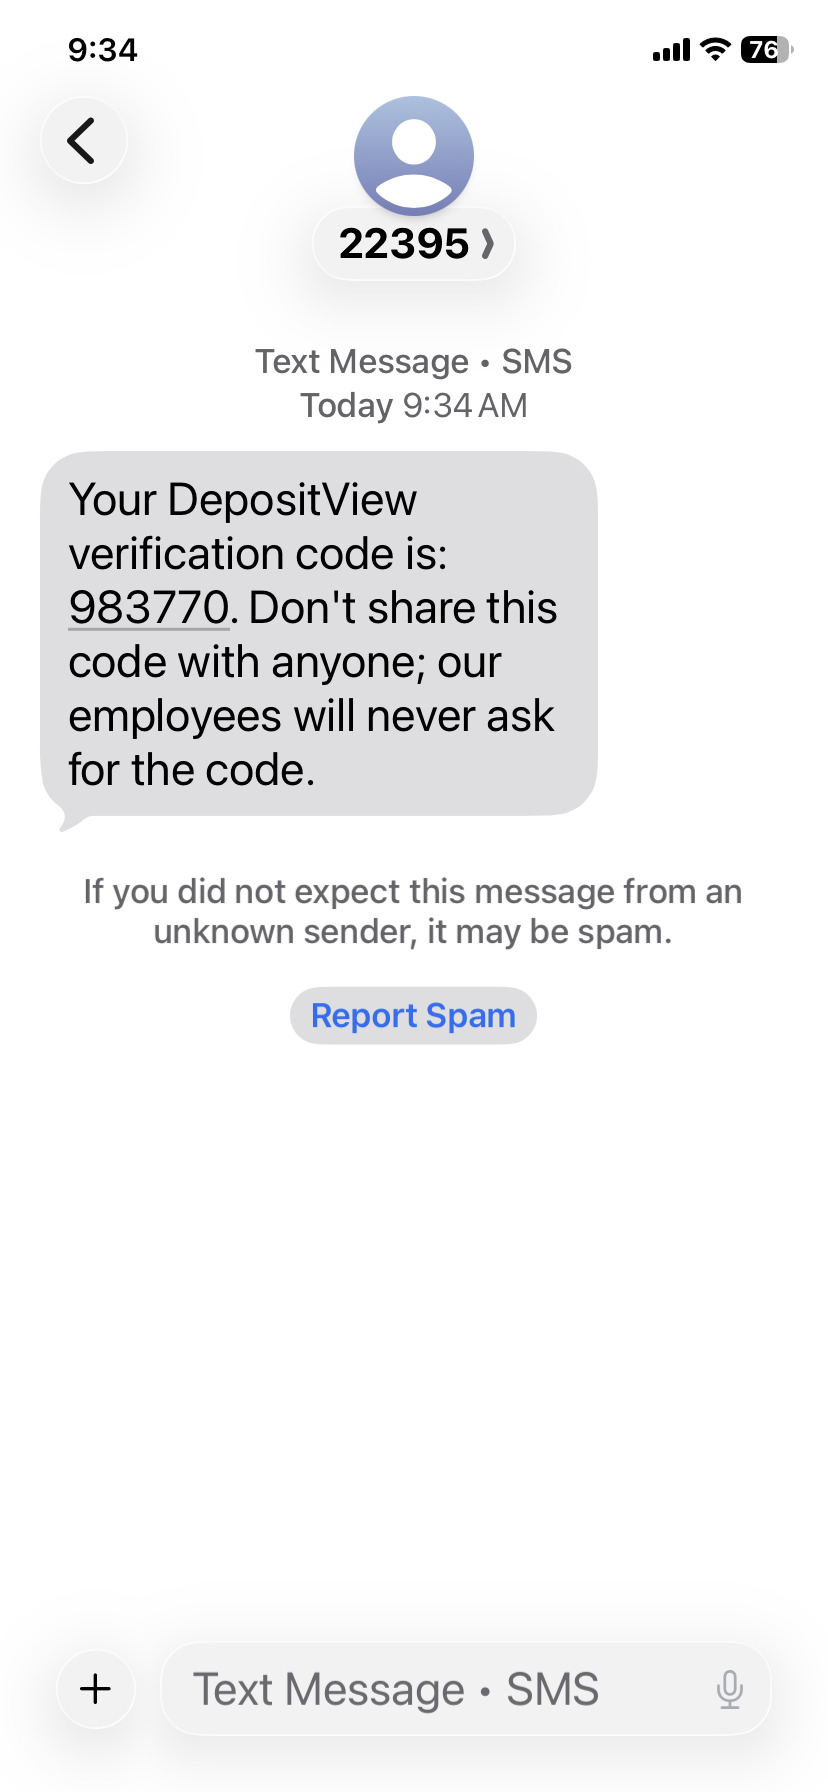
Verify Identity: You will receive a One-Time Passcode (OTP) via text or phone call. Enter this code when prompted.
-
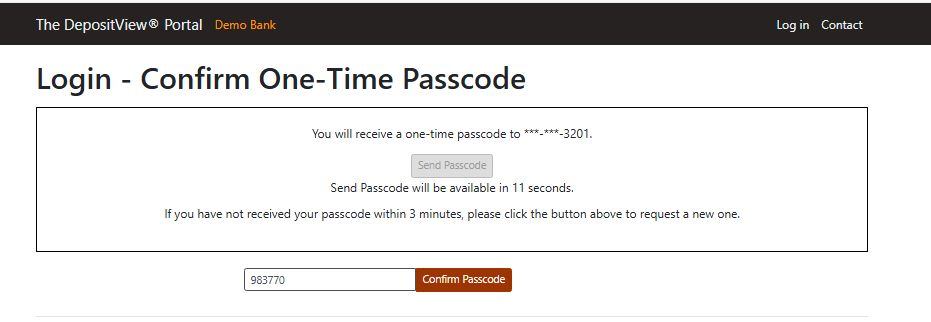
Access: Enter the OTP to access your Accounts.
-
Create Credentials:
-
Username: Create a unique username (minimum 6 characters; not case-sensitive).
-
Password: Create a password that meets the requirements (12–128 characters, cannot be the same as the username, case-sensitive, cannot contain three identical characters in a row, must include at least one uppercase letter, one lowercase letter, one number, and one special character).
-
-
Set Security Questions: Select three unique security questions, enter your answers, and click Submit.
-
Finalize: After submitting your questions, you will be redirected to the login page to sign in with your new credentials.
Standard Login & Troubleshooting
Once registered, you can access your accounts through the DepositView® home page.
Standard Login
-
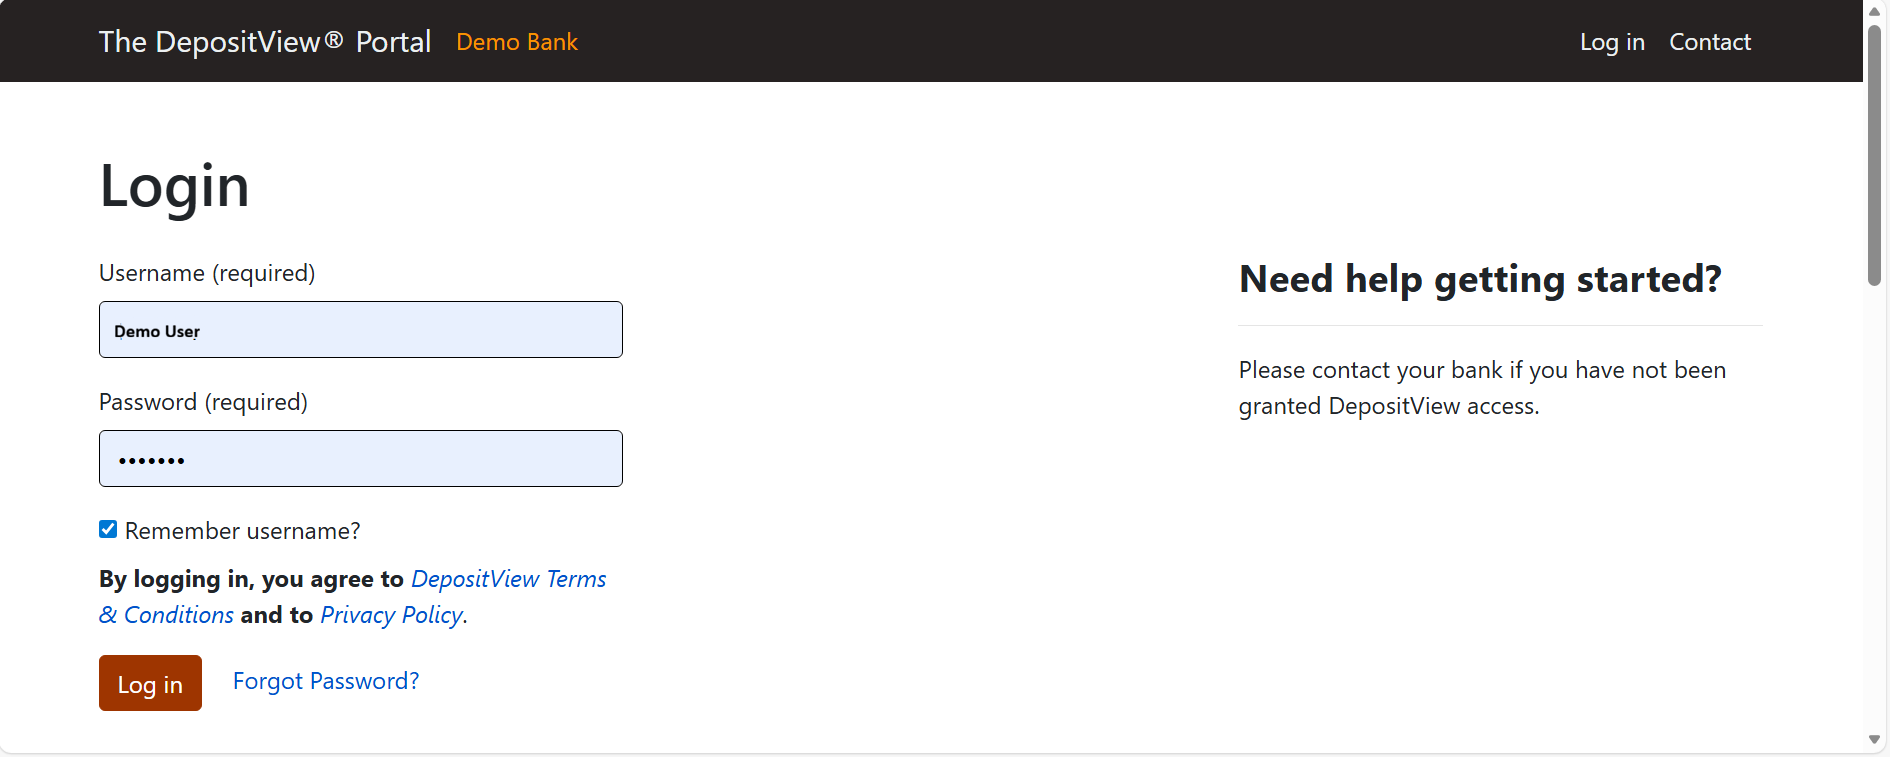
Enter your username and password.
-
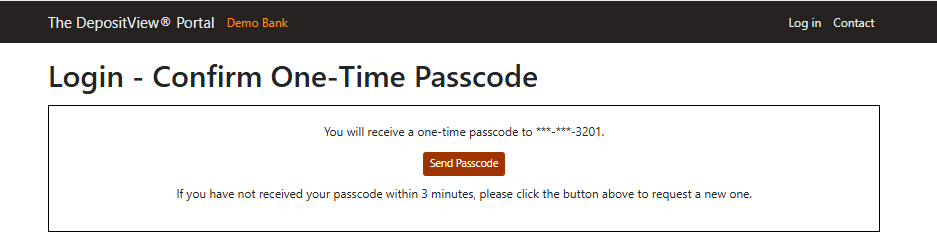
Click on Send Passcode to receive a new OTP.
-
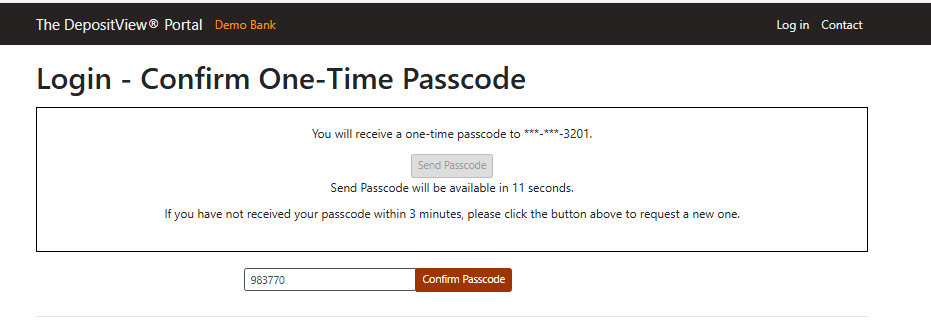
Enter the new OTP sent to the phone number registered for your account.
Failed Login
If you enter an incorrect username or password, you will receive an "Unsuccessful Login" error message.
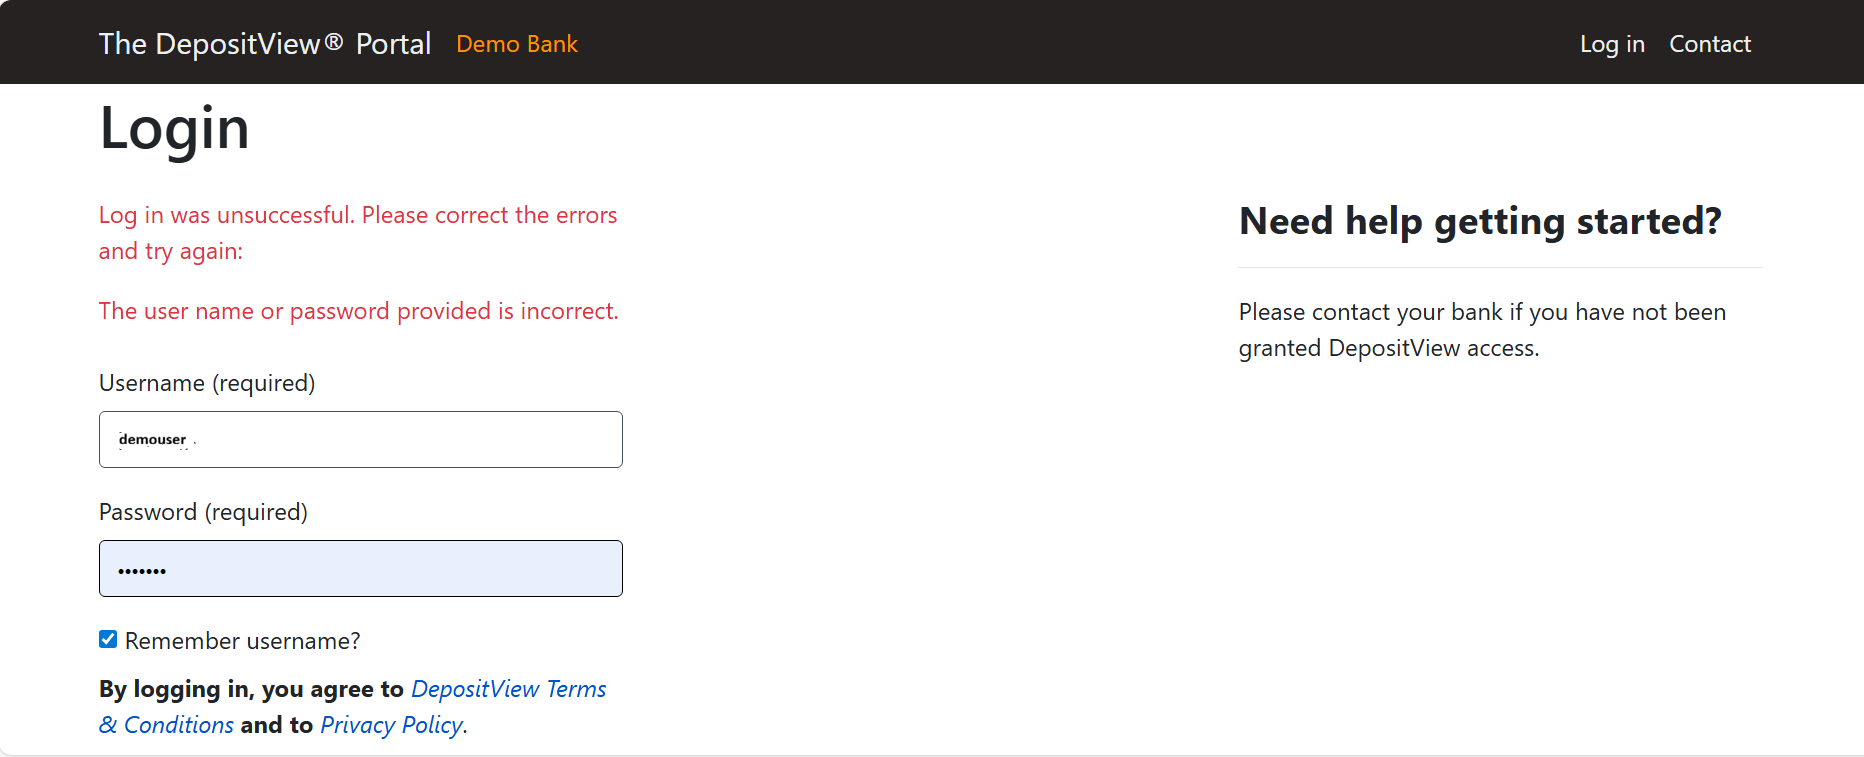
If you cannot log in after multiple attempts, your account may be locked. To regain access, follow the steps in Forgot Password or contact your administrator to Unlock User.
Incorrect Passcode & OTP Limits
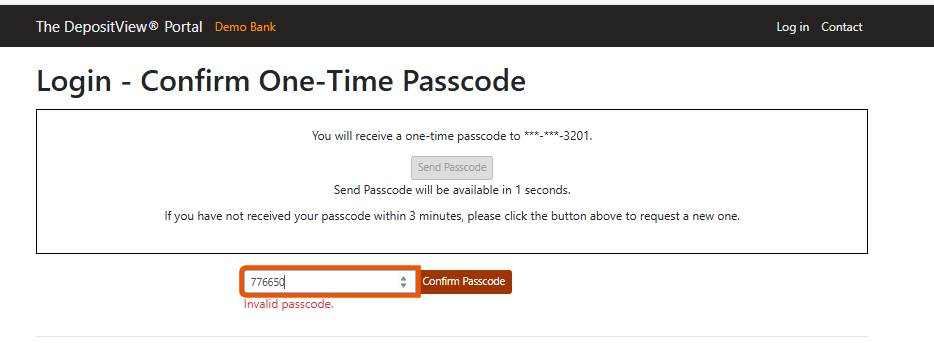
If you enter an incorrect passcode, you receive an "Invalid passcode" error message. You have a maximum of 5 attempts to enter an OTP and 5 attempts to request a new code.
Note: If you exceed these limits, you must wait 10 minutes for the current OTP to expire before you can request a new verification code.
Forgot Password
If you have forgotten your password, you can reset it directly from the login page. See Reset Password for detailed instructions.
Accounts
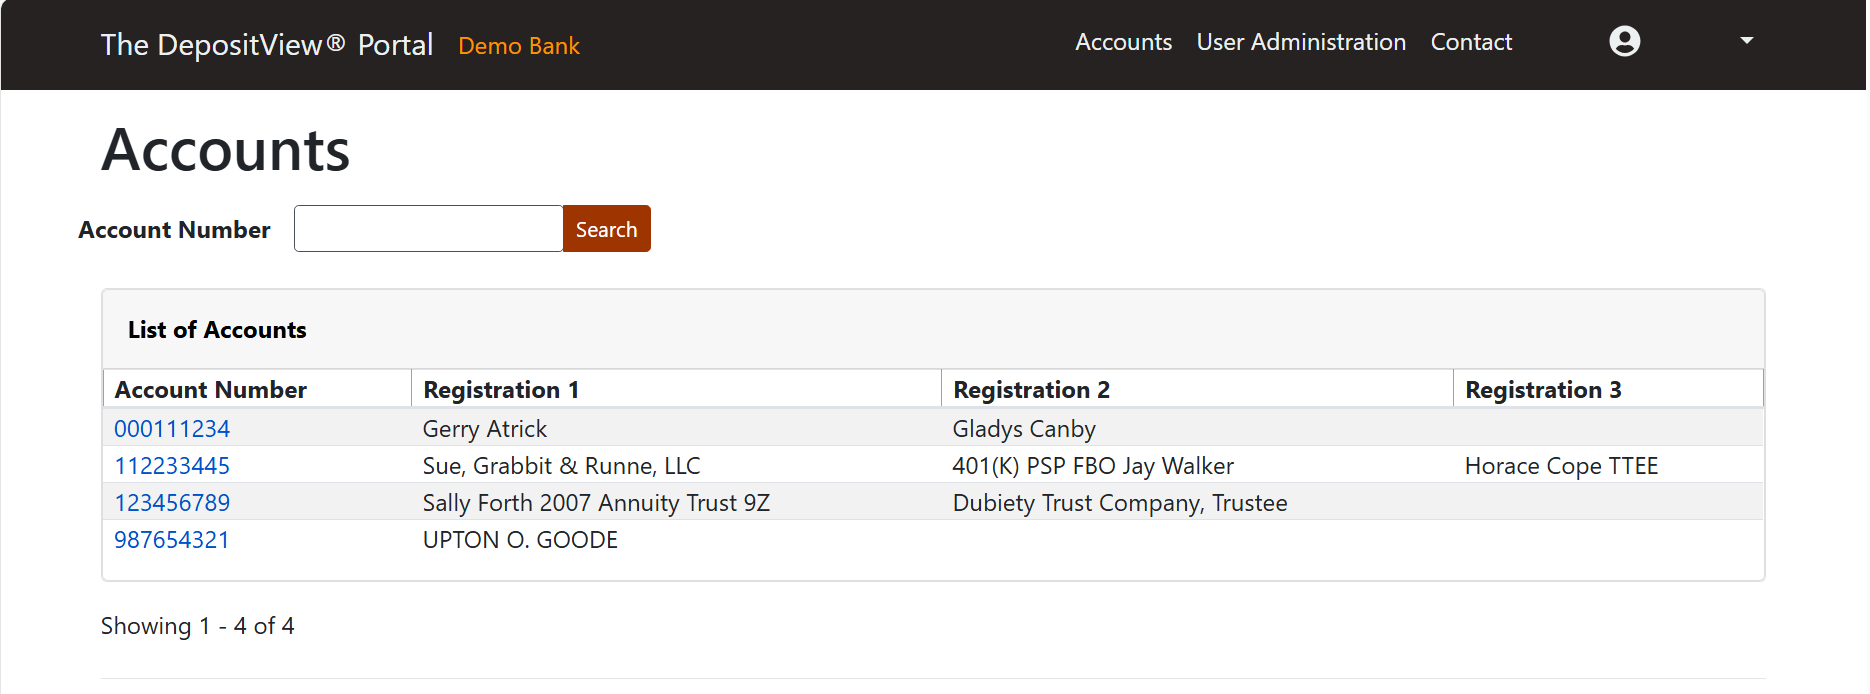
Once logged in, you are directed to the Accounts page, which lists all your accounts. From here you can:
-
Use the search tool to find an account by entering a full or partial account number and click Search.
-
Click directly on an Account Number to open its specific Account Summary.
If you only have access to one account, you are directed straight to that Account Summary.
Accounts Summary
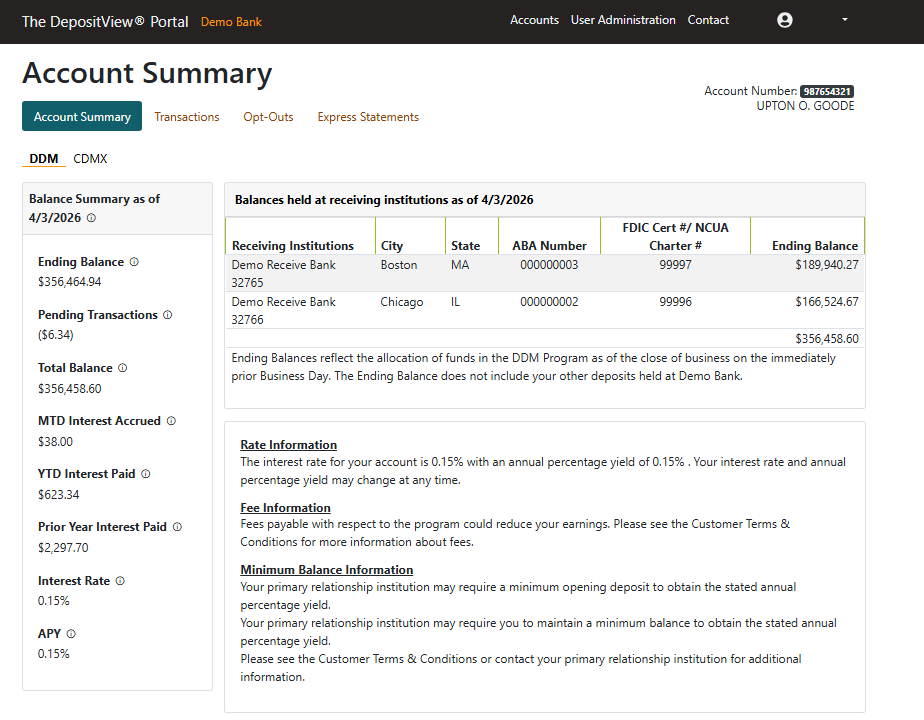
The Account Summary page is divided into four informational tabs: Account Summary, Transactions, Opt-Outs, and Express Statements.
DDM
This view provides a balance summary and details regarding funds held at your selected Receiving Institutions.
Key Terminology
-
Balance Summary as of [Date]: Your total balances, including principal and accrued interest, for the specified date.
-
Ending Balance: Total funds held at all Receiving Institutions at the close of the business day.
-
Pending Transactions: Total pending net dollar amount of deposits and withdrawals.
-
Total Balance: The sum of your Ending Balance and Pending Transactions.
-
MTD Interest Accrued: Total interest accrued Month-to-Date (MTD).
-
YTD Interest Paid: Total interest paid Year-to-Date (YTD).
-
Prior Year Interest Paid: Total interest paid in the previous calendar year.
-
Interest Rate / APY: The current interest rate and Annual Percentage Yield used to calculate accruals.
CDMX
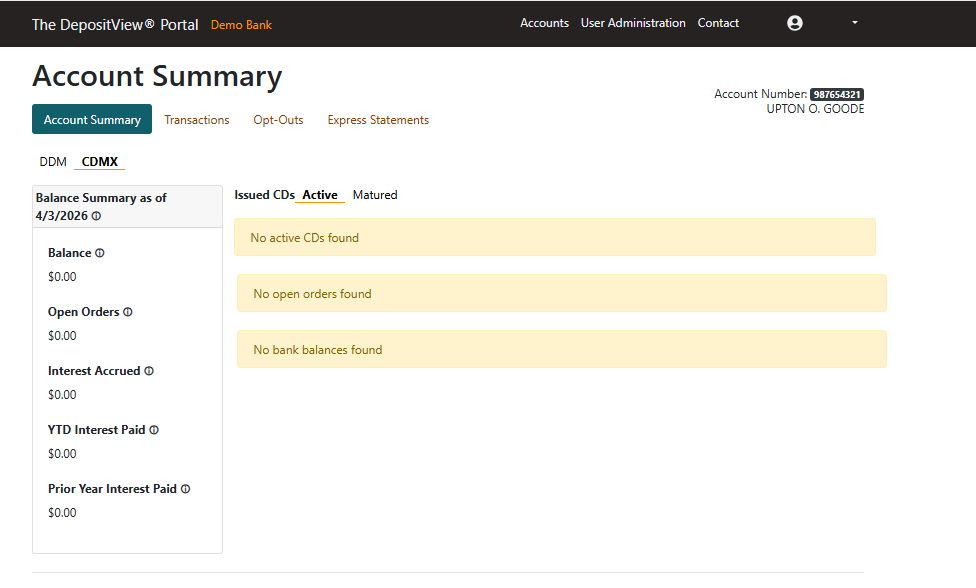
The CDMX summary mirrors the DDM layout but is tailored for Certificate of Deposit (CD) tracking. You can toggle between the Active and Matured CDs tabs.
CD-Specific Terminology
-
Open Orders: Balance of CDs that have been ordered but not yet settled.
-
Interest Accrued: Total interest accrued on your active CDs.
-
Settlement Date: The date the CD was issued.
-
Term: The duration of the CD (in weeks).
-
Maturity Date: The date the CD matures.
-
Principal: The initial amount of the CD.
Active CD Details
To view granular data for a specific CD, click the information icon under the Details column. From here, you can:
-
View Specifics: This window displays the settlement date, term, maturity date, estimated interest at maturity, and maturity instructions.
-
View Allocation: You can see exactly which Receiving Institutions your CD funds are allocated to.
Note on Balances: In the CD Details section, the "balance" represents the amount allocated to that specific Receiving Institution. This may differ from the "ending balance," which includes all settled transactions and adjustments.
Matured CD Details
The Matured tab displays CD Details for CDs that have reached the end of their term or have been liquidated. This view is similar to the Active tab, with one key difference: the list of Receiving Institutions is no longer shown, as the funds are no longer allocated once the CD matures.
Click the information icon to view specific details for a matured CD, including the original settlement date, term, and accrued interest.
If a CD was redeemed before, this is considered an Early Withdrawal. In these cases, you will see the following additional information:
-
Withdrawal Date: The date the funds were removed.
-
Reason for Early Withdrawal: Specifies why the CD was redeemed (e.g., Death, Disability, or Sending Institution's Discretion).
-
Penalty Amount: The fee charged for withdrawing funds early.
Note: There is no penalty if the reason for withdrawal is "Death" or "Disability." A penalty may apply for customer-directed early withdrawals.
-
Total Withdrawal Amount: The final sum you received after any applicable penalties were deducted from the CD balance.
Transactions
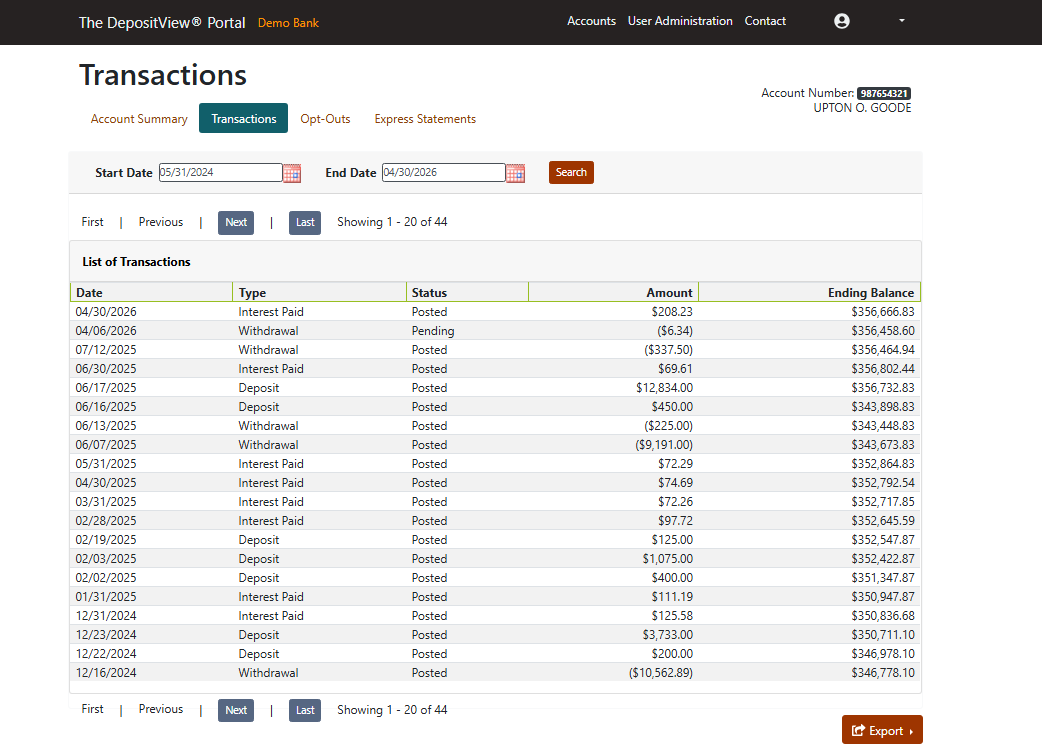
The Transactions page displays a history of all pending and posted transactions for your account. To access this page, click the Transactions tab.
Viewing Transactions
Use the following columns to review your account activity:
Date
The date the transaction occurred.
Transaction Type
The nature of the activity (e.g., deposit, withdrawal, interest paid).
Transaction Status
Indicates if a transaction is Pending, Posted, or Completed.
Transaction Amount
The specific dollar value of the entry.
Managing Your Data
Search by Date
To find transactions within a specific timeframe, enter a Start Date and End Date in the search fields.
Export Records
Click Export to export your transaction data to a CSV or Excel file for your personal records or accounting.
Opt-Outs
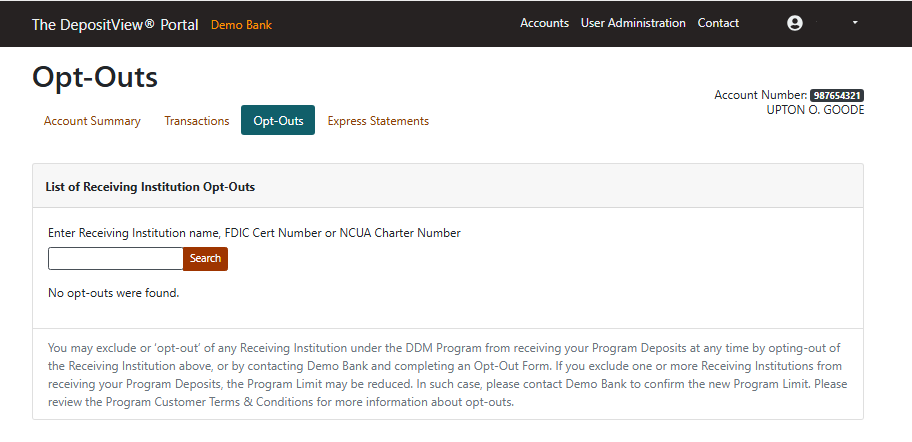
The Opt-Outs page allows you to request that specific banks be excluded from receiving your deposits. This view lists all your current exclusions, including the Bank Name, City, State, ABA Number, and FDIC Certificate Number.
Adding an Opt-Out
You can exclude a Receiving Institution from your DDM Program at any time.
-
Search: Click the Add Opt-Outs button. You can search for specific banks using the Institution Name, ABA Number, FDIC Certificate Number, or Charter Number.
-
Select: Find the bank in the alphabetized list and click Add.
-
Confirm: Review your selection in the "List of Selected Banks" and click Confirm.
-
Verify: Once confirmed, the bank will appear in your Pending Opt-Outs list.
Note on Timing: Opt-out requests typically go into effect on the same Business Day if submitted before 3:00 pm ET. Requests made after this time will take effect on the next Business Day.
Removing an Opt-Out
If you wish to resume deposits to a bank that was previously excluded, you can remove it from your list.
Remove an Active Opt-Out
In the "List of Receiving Institution Opt-Outs," find the bank and click Remove in the Action column. You will be prompted to confirm the removal.
Remove a Pending Opt-Out
If the opt-out has not yet gone into effect, you can navigate to the Pending Opt-Outs list and select Remove under the Action tab to cancel the request.
Express Statements
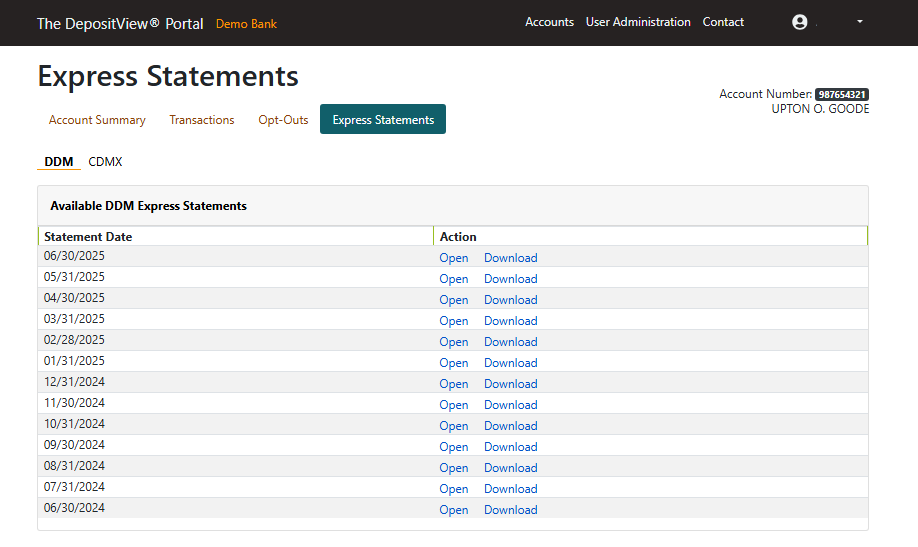
The Express Statements page provides access to your account activity records from the last 13 months. These Express Statements are available for both DDM and CDMX programs.
Access Express Statements
You can view or download Express Statements covering the prior 13-month period.
Format
Express Statements are available in PDF format.
Actions
For any available Express Statement date, you can select Open to view it in your browser or Download to save a copy to your device.
Express Statement Data
While the Express Statement provides a comprehensive look at your activity, it is not a replacement for a formal statement received directly from your financial institution.
DDM Express Statement
Includes your account activity (deposits, withdrawals, interest), your balances at specific Receiving Institutions, and an interest summary (Interest Earned and APYE - Annual Percentage Yield Earned).
CDMX Express Statement
Provides a summary of CD purchases and maturities, detailed account activity, and a list of current deposits by Receiving Institution.
User Account Information (MFA Only)
This section provides instructions for managing your account credentials and security settings. These features are specifically for users enrolled in Multi-Factor Authentication (MFA).
Reset Password
To reset a forgotten password, initiate the recovery flow from the login page.
Initiation
-
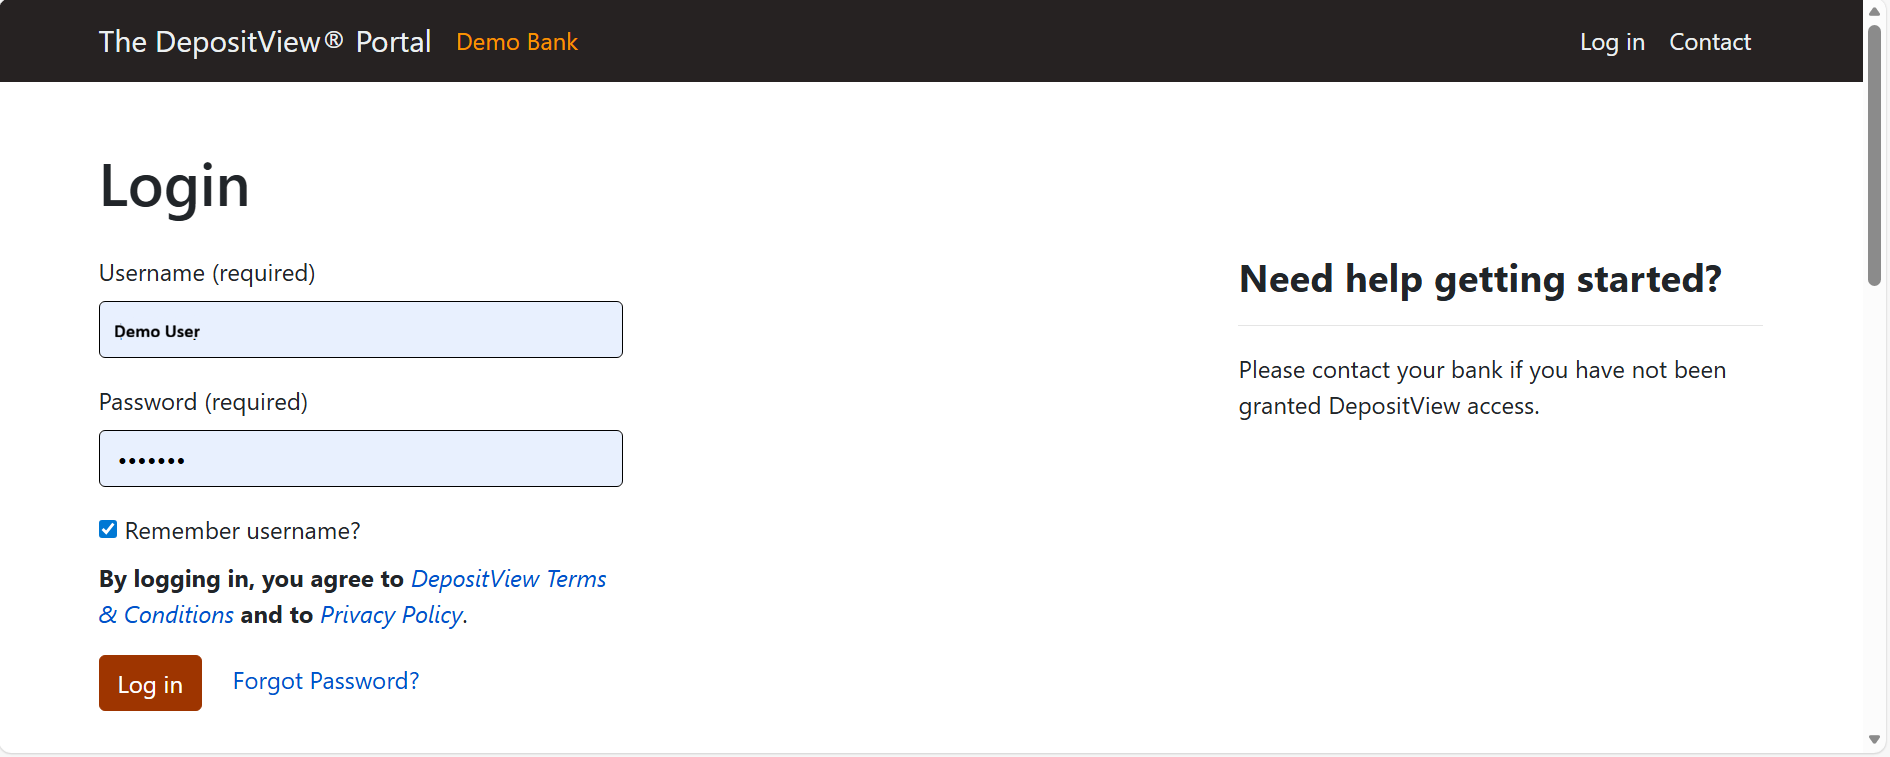
Select the Forgot Password link on the login page.
-
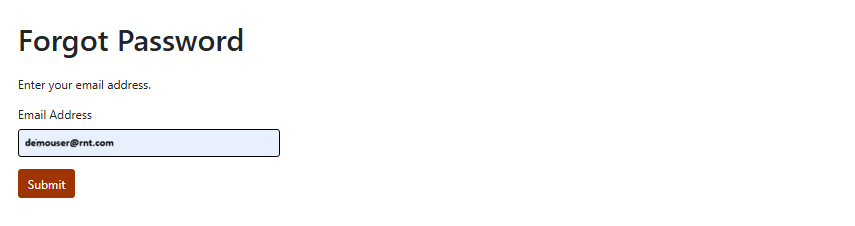
Enter the associated Email Address.
-
Click Submit.
-
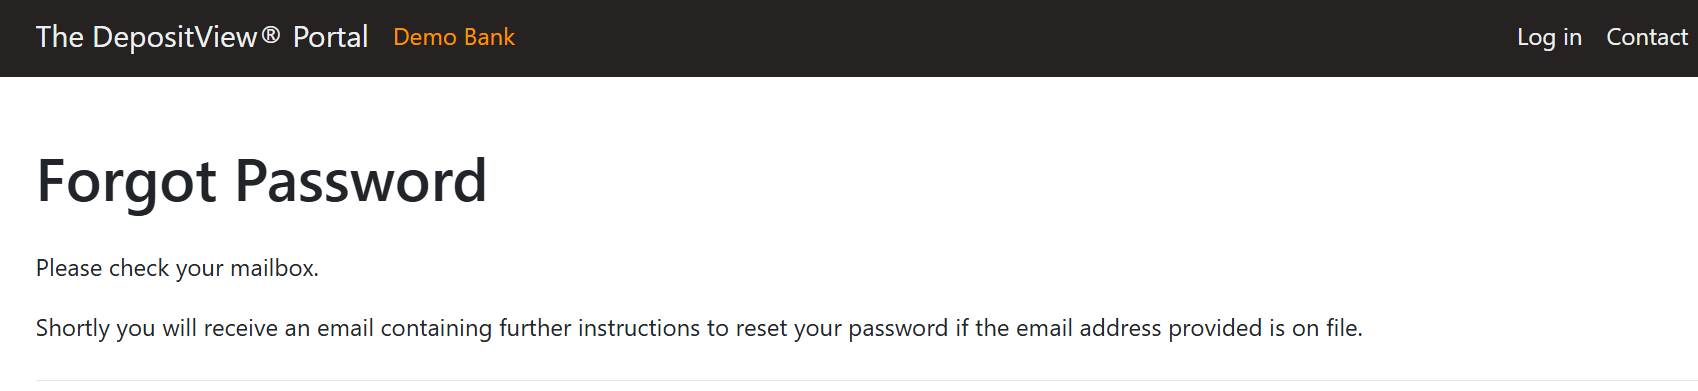
Review the confirmation page for the instruction to check the registered email account.
Credential Reset
-
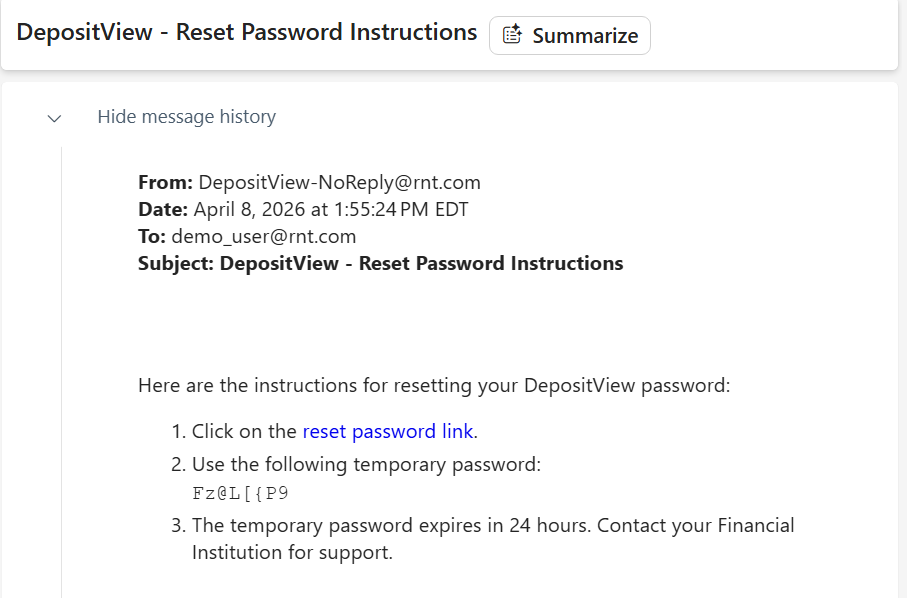
Click the Reset Password link provided in the system-generated email.
-
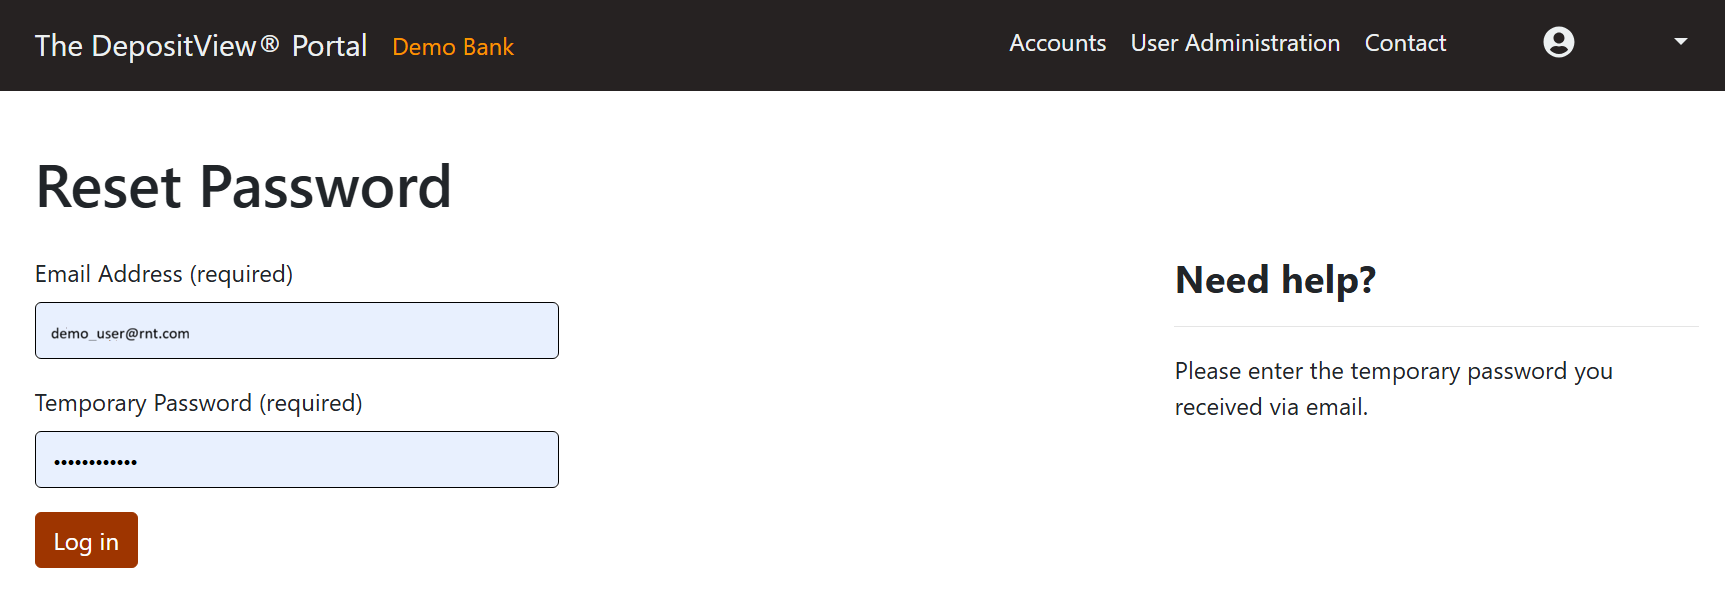
Enter the Email Address and the Temporary Password provided in the email.
-
Click Log in.
Verification & Update
-
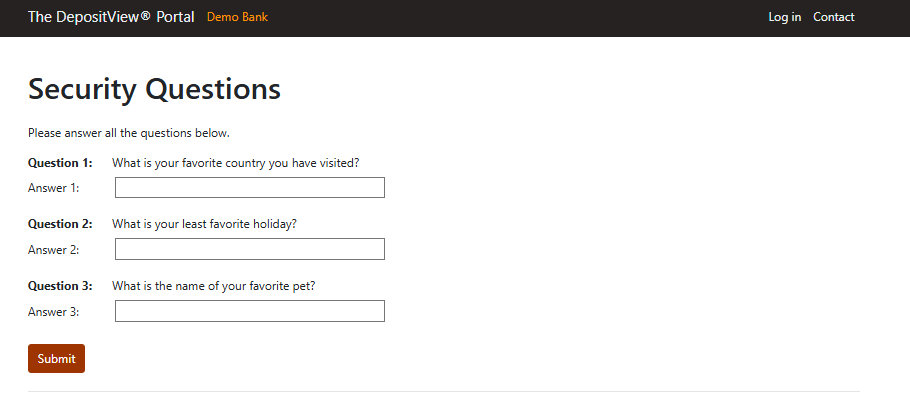
Provide the answers to the Security Questions.
Note: If you fail to correctly answer your security questions after multiple attempts you will be locked out for 30 minutes.
-
Click Submit.
-
Enter a New Password.
-
Confirm the New Password.
-
Click Change Password.
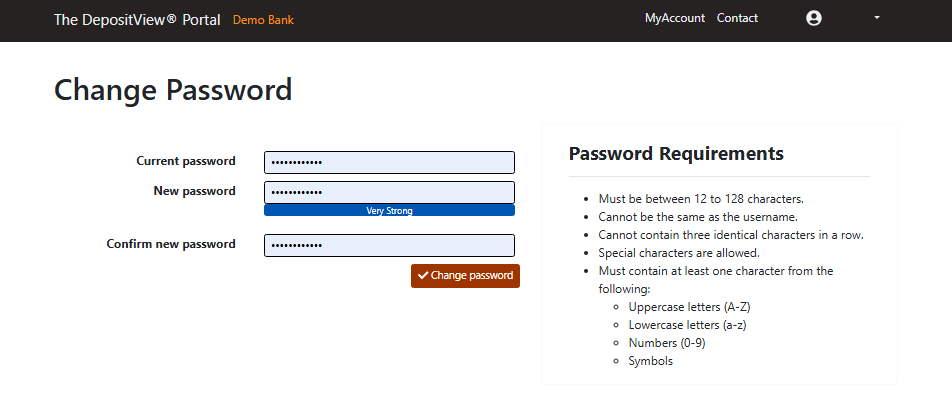
A confirmation page with the success message, "Your password has been changed" appears.

Confirmation
A success message is displayed upon the completion of the password update.
Manage User Details
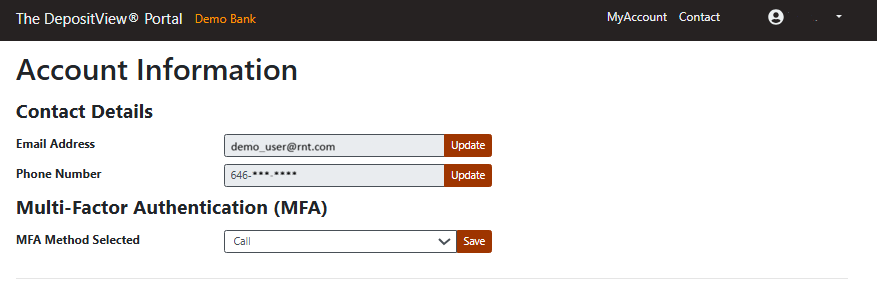
From the top navigation, click on the arrow next to your username and select User Information from the dropdown to access the Account Information page:

Update Email Address
-
Click on Update next to Email Address to update the email address on file.
-
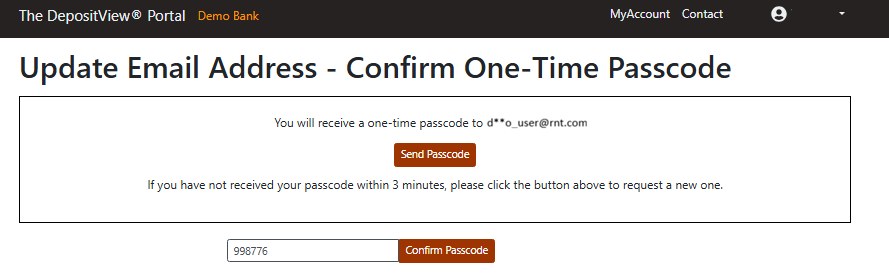
Click Send Passcode to receive a new One-Time Passcode (OTP).
-
Enter OTP and click Confirm Passcode.
Update Phone Number
-
Click on Update next to Phone Number to update the phone number on file.
-
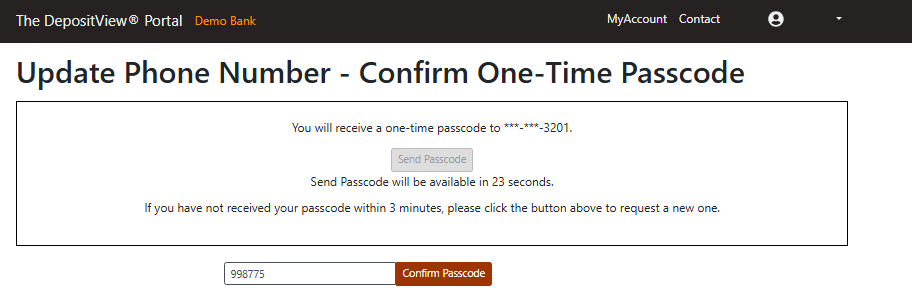
Click Send Passcode to receive a new One-Time Passcode (OTP).
-
Enter OTP and click Confirm Passcode.
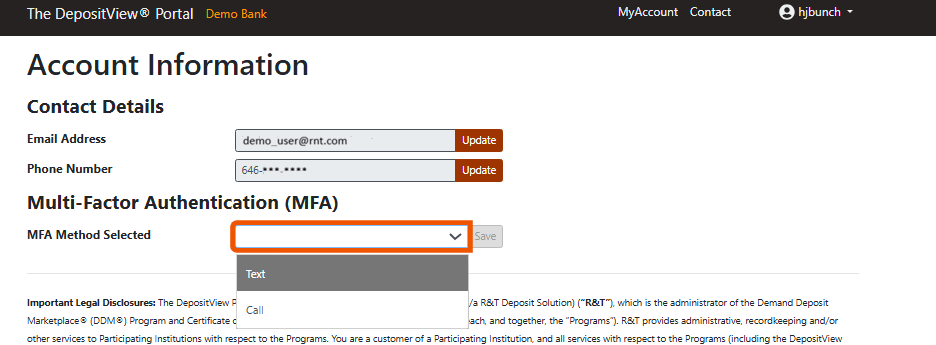
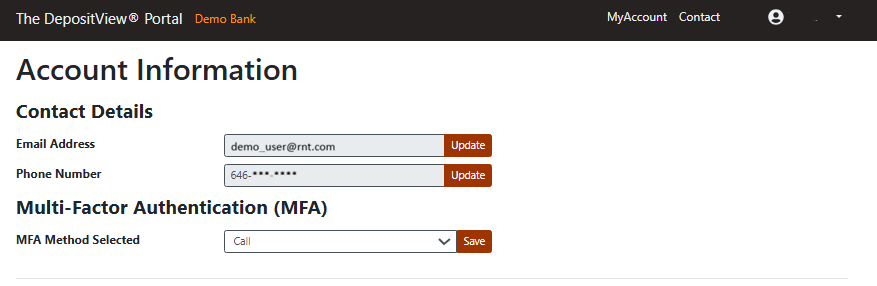
Update Default MFA Method
Select Text or Call from the dropdown and click Save to update the default MFA method.
Reset Security Questions
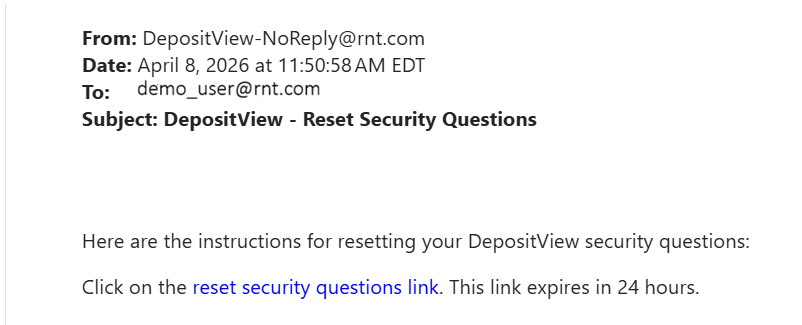
Answers to security questions are required to use the self-service forgot password process. If you forget the answers to your security questions, contact your Administrator to receive an email to reset your security questions.
-
Click on the reset security questions link in the email.
-
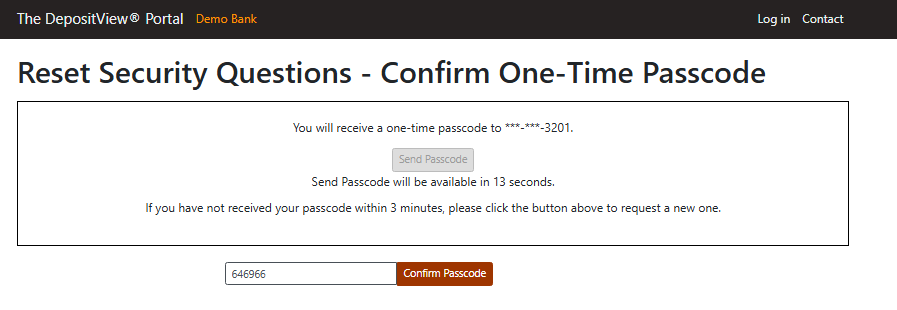
Enter the OTP and click Confirm Passcode.
-
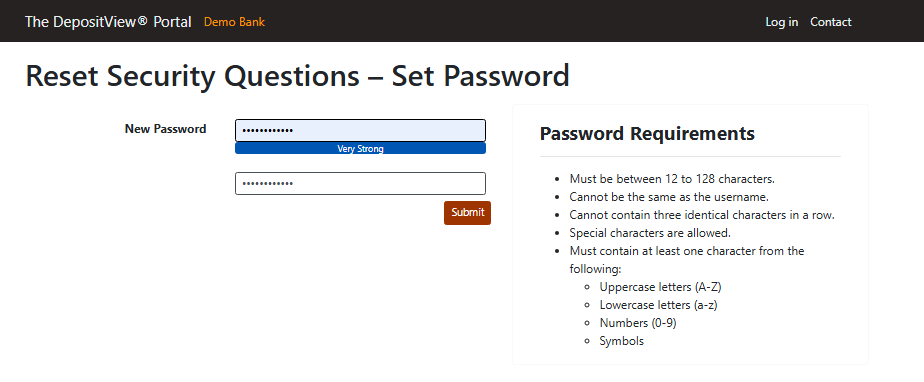
Enter and confirm the new password.
-
Click Submit.
-
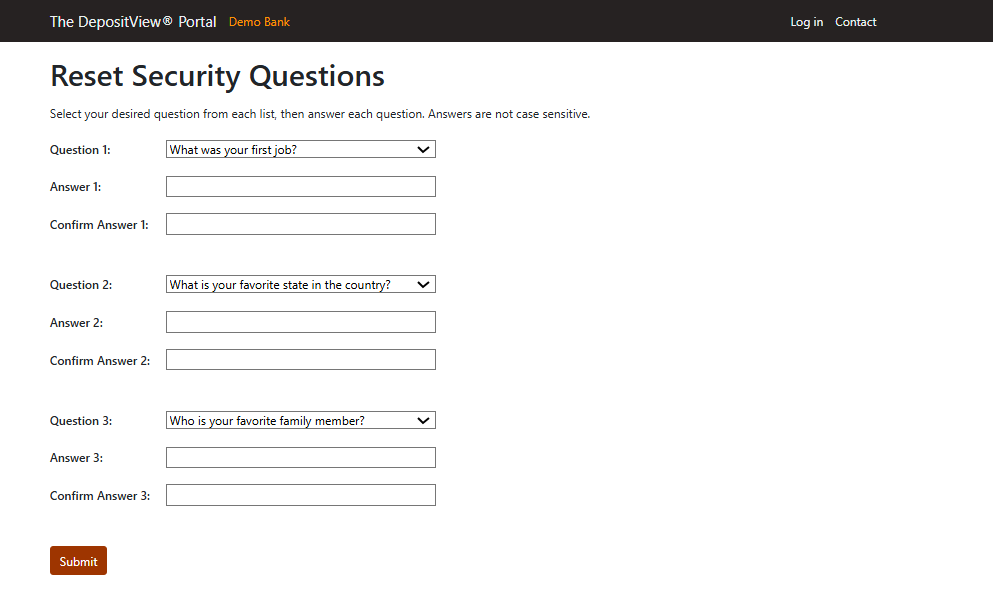
Select security questions, enter your answers, and click Submit.
Change Password
To change your password while logged into the portal:
-
From the top navigation, click on the arrow next to your username and select Change Password from the dropdown.

-
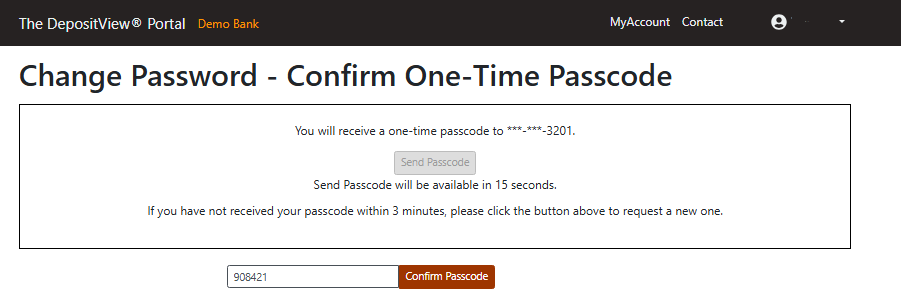
Click Send Passcode to receive a new One-Time Passcode (OTP).
-
Enter the OTP and click Confirm Passcode.
-
Enter a New Password.
-
Confirm the New Password.
-
Click Change Password.
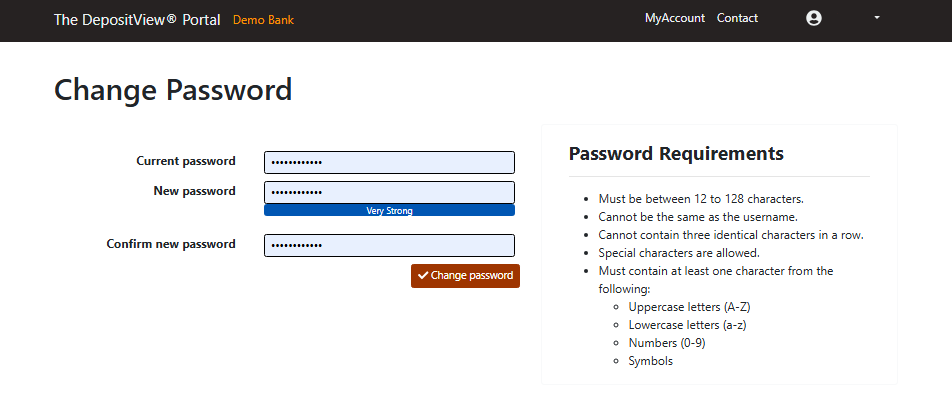
A confirmation page with the success message, "Your password has been changed" appears.

Resend Invitation
If you lose your registration email before completing the sign-up process, contact your Administrator to request a new invitation.
Unlock User
If your account is locked, contact your Administrator to request an account unlock.
Updated 20 days ago